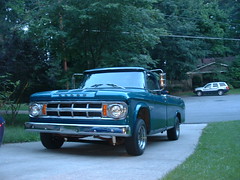
Wednesday, June 10, 2009

Looking good

Just sittin' outside looking good.

DSCF0102

Monday, June 08, 2009

Swepty got a new windshield!

Photo0050

DSCF0099

DSCF0095

DSCF0093

Looks great! And now we can drive the truck in the rain!!

Door panels for the Sweptline

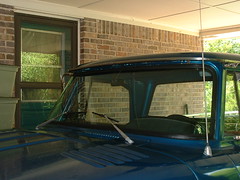
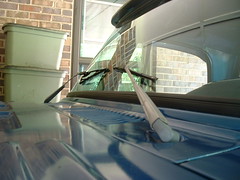
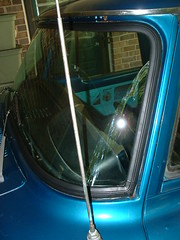
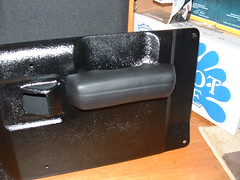
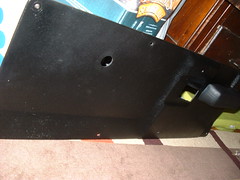
We got in an order of window parts recently for the Swepty. I wanted to replace the felts and cat whiskers around the door windows. I took off the door panels to gain access and decided that while I was in there I'd redo the door panels since some of the dye was coming off.

DSCF0092

DSCF0089

New trans cooler lines for the truck

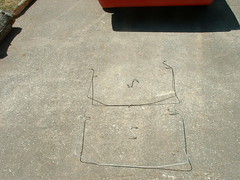
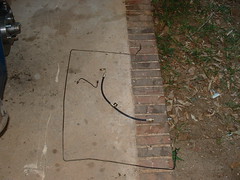
The trans lines were leaking. I decided to replace the. They were cobbled together from scraps. They came out of the trans into a hardline, went to a high pressure hose, back to hard line then to low pressure rubber hose, then back to hardline and into the trans cooler. This was the same for the return line too except one side had a union.

I bent up my own. They do not follow the factory routing as I wanted them out of the way. I bent them to tuck over next to the frame rail. So far so good.

Here's one of the lines. 5/16 hard line. It was difficult to bend without having it collapse. I'm glad I finally bought a bender tool.
DSCF0084

There was an annoying and loud ticking noise at highway speed that would get much louder when you got on the gas some. That ticking noise is now gone. I'm guessing it was the high pressure relief in the trans. The old lines had so much back pressure from all the junctions they just didn't function right: very scary.

Friday, December 21, 2007

All is calm on the old vehicle front

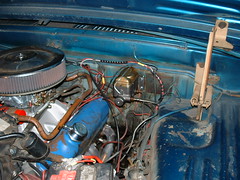
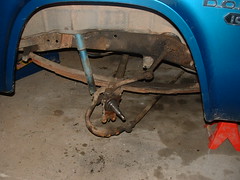
I did install a torque strap (some thick chain from the frame to behind the water pump -- the picture below shows the chain going to the head; I moved it). I should now be able to keep the fan out of the radiator.

Engine Strap

Saturday, October 13, 2007

Finally!

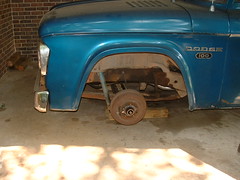
We've been without a working truck for about 2 months now. It is a long story that I really don't want to get too far into. The long and the short of it is; I the throttle stuck and I ended up breaking both motor mounts, the trans mount, the radiator and the cooling fan.

It took about 2 months because I just didn't have the time to work on the truck full time. I could order a few parts, then wait on them, then install them, then move on. On more than on occasion, parts I ordered either subsequently broke, or were not right from the get-go. I even got to reuse an old fan I had with a thermostatic clutch. Of course, the thermostatic part of it was broke. We still don't have a fan shroud, but the outside temps finally feel like fall, so, not having a fan shroud should be of little consequence until summer.

One of the biggest problems has been getting the SOB to "cool" properly. Turns out, the truck was cooling just fine. But the old style mechanical voltage regulator built into the fuel gauge that also powers the temp sensor was failing. I finally smoked it trying to fix it. I then hooked up a semiconductor regulator (after much misinformation) and now things are all good.

Yay truck!

Saturday, May 19, 2007

Build Day 2

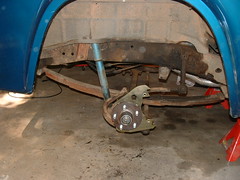
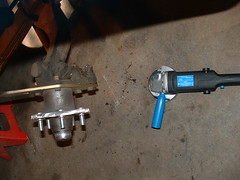
Not too many pictures from Build Day 2. Much of it was slow and tedious work. But it was still work.

I bent new lines with the new fittings. I then discovered the big fittings I bought also had a bigger ID, so I had to cut the flange off of the old and new lines, salvage the big fitting from the old lines, and then reflange the new lines. Hand bending and hand flanging of the lines, along with the fitting boondoggle took a few hours.
New Lines

Then it was time to install the new master cylinder. Another boondoggle all to itself. First, you have to use a new master cylinder because the old drum brake MC has a residual valve to keep about 9-10psi on the the line that you don't want with discs. Plus, mine leaked some, so a new MC was a good idea. The push rod and hold down setup are different between the two MC's. So after a few hours of cutting, cussing, and body contortion, I finally got it installed.
New MC

And now for the fun part. "Driving it?" you ask. Nope, the tedious job of bleeding the brakes where it seems like no matter how much bleed them the brake feel is still too soft and you need to bleed some more. Finally, at about 8pm I just got tired of messing with it. I put the wheels back on it and dropped it to the ground. I took it for a spin around the block and there needs to be much more bleeding of brakes. But after cleaning everything up, it was after 9pm. I'm done with this until tomorrow.

Thursday, May 17, 2007

Build Day 1

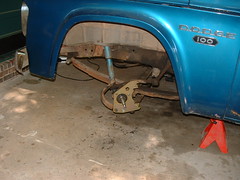
I was really kind of hoping to get the truck back down on tires today, but it just didn't happen. I did make some decent forward progress.
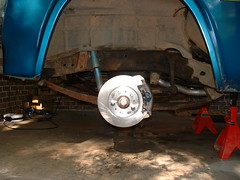
Here's the baking plates that hold the calipers.
Back Plates

I'd taken the hubs off, had the wheel studs pressed out and new ones pressed in (Dodge put left hand studs on the driver side years ago that, today at least, really confuses people). I also cleaned them and all the bearings up. I had to repack the bearings with grease and press in new seals. The AutoZone nearest to me did not have the seals, so I had to go to another AutoZone, and they had the seals, but two different kinds. That's why they look different in the photos, but they should still work.

Of course, the hubs were different too. The one on the right had a smaller cavity for grease and also had a slightly larger diameter due to a lip (that's important later).
Hubs

Here's the driver side hub on.
Hubs On

The lip on the passenger side hub ended up getting in the way of the rotor when I went to put it on. I had to whip out the angle grinder and make some room.
Making Room

Here's the rotor on and ready to go.
Rotor On

And now for the caliper and pads.
Caliper

Finally the new hoses and banjo bolts. But... then we run into the problems.
HoseJPG

The original fitting on the hard line running from the distribution block is too big to fit into the new hose.
Wrong Size

So I pulled all the hard line for the front brakes and will redo it as soon as I can get hard line and fittings.
What Needs Replacing

Sunday, May 13, 2007

Part I - Dissassembly

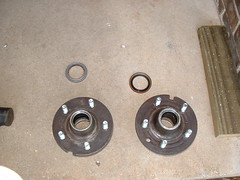
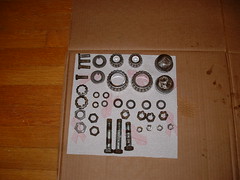
This is what we're starting with. A set of 11" drums. Once I took this apart, the drums look pretty good. I might end up trying to sell them.
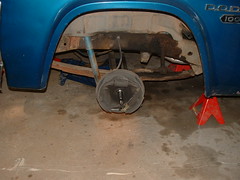
Driver Drum
Here's a close up of the suspension. Front leaf springs ride great ....
Drum Off
Got the drums off easy. And found new hardware. Someone rebuilt these not too long ago. It stops well if you are ready to pump the brakes some. I wonder how much of the stuff from the fronts I can use on the back. The backs are really wore out.
Drum Off
Finally, after some cussing and fighting I got the backing plates off. I ruined one bolt that was super stuck. Now I get to find a suspension bolt that isn't something you can go pick up at AutoZone.
Back Plate Off
Finally cleaned up all the bearings and ran down all the threads I had tools for.
Cleaner Parts
I may start putting it back together tomorrow, but I won't be able to finish it off since I need the bolt.